This page was last updated on Saturday, April 06, 2019 07:56 AM
I have a new project started, converting a friend's Allis Chalmers 5050 tractor from mechanical steering with power assist to full hydrostatic steering.
This particular tractor has front wheel assist on it, and uses a small power steering cylinder located inside the front frame block to assist the original mechanical steering. The steering sector failed internally, only to find out that no parts are available for it any longer. The rest of the tractor is fine, so what to do? Simple! Convert it to full hydrostatic steering! It turns out that this project is far more involved than meets the eye! We went through a bunch of math to figure out what size rotary steering valve to purchase. Once that was in hand we had to design a bracket with which to mount the rotary valve and steering column. You might think that this would be pretty simple, but it proved to be quite difficult. Keep in mind that most folks use the steering wheel as a grab handle when climbing onto the tractor, and it is basically at the end of a long lever - the steering column. Due to that, it is necessary to make the mounting bracket quite robust. Add to that the fact that we need to make the steering column fit where the old one did AND get the hydraulic hoses to reach it. It took quite a bit of measuring and planning and designing, but I finally came up with a wooden prototype bracket which I quickly cut all to pieces to get everything to fit. A couple weeks later I had version 2 ready and it worked well, needing only a couple of little tweaks. With that out of the way, I got started making the steel parts from which we would fabricate the new bracket.
We recently discovered a new twist to this project which revealed why the steering sector failed in the first place. We found that the right front wheel was very difficult to swing from side to side, even when suspended in the air. We literally had to use a handyman jack to turn the wheel back and forth, but the left wheel could be moved with one hand. Further investigation revealed that the previous owner had replaced the needle bearings in the steering knuckle but did not put all of the shims back where they belonged. This resulted in one of the pins squeezing on the axle housing all the time, making the right wheel difficult to swing left and right. Once the two pins were properly shimmed, the problem was gone. Sadly, the damage to the steering sector had already occurred, so the hydrostatic steering project continues.
Photos coming soon!
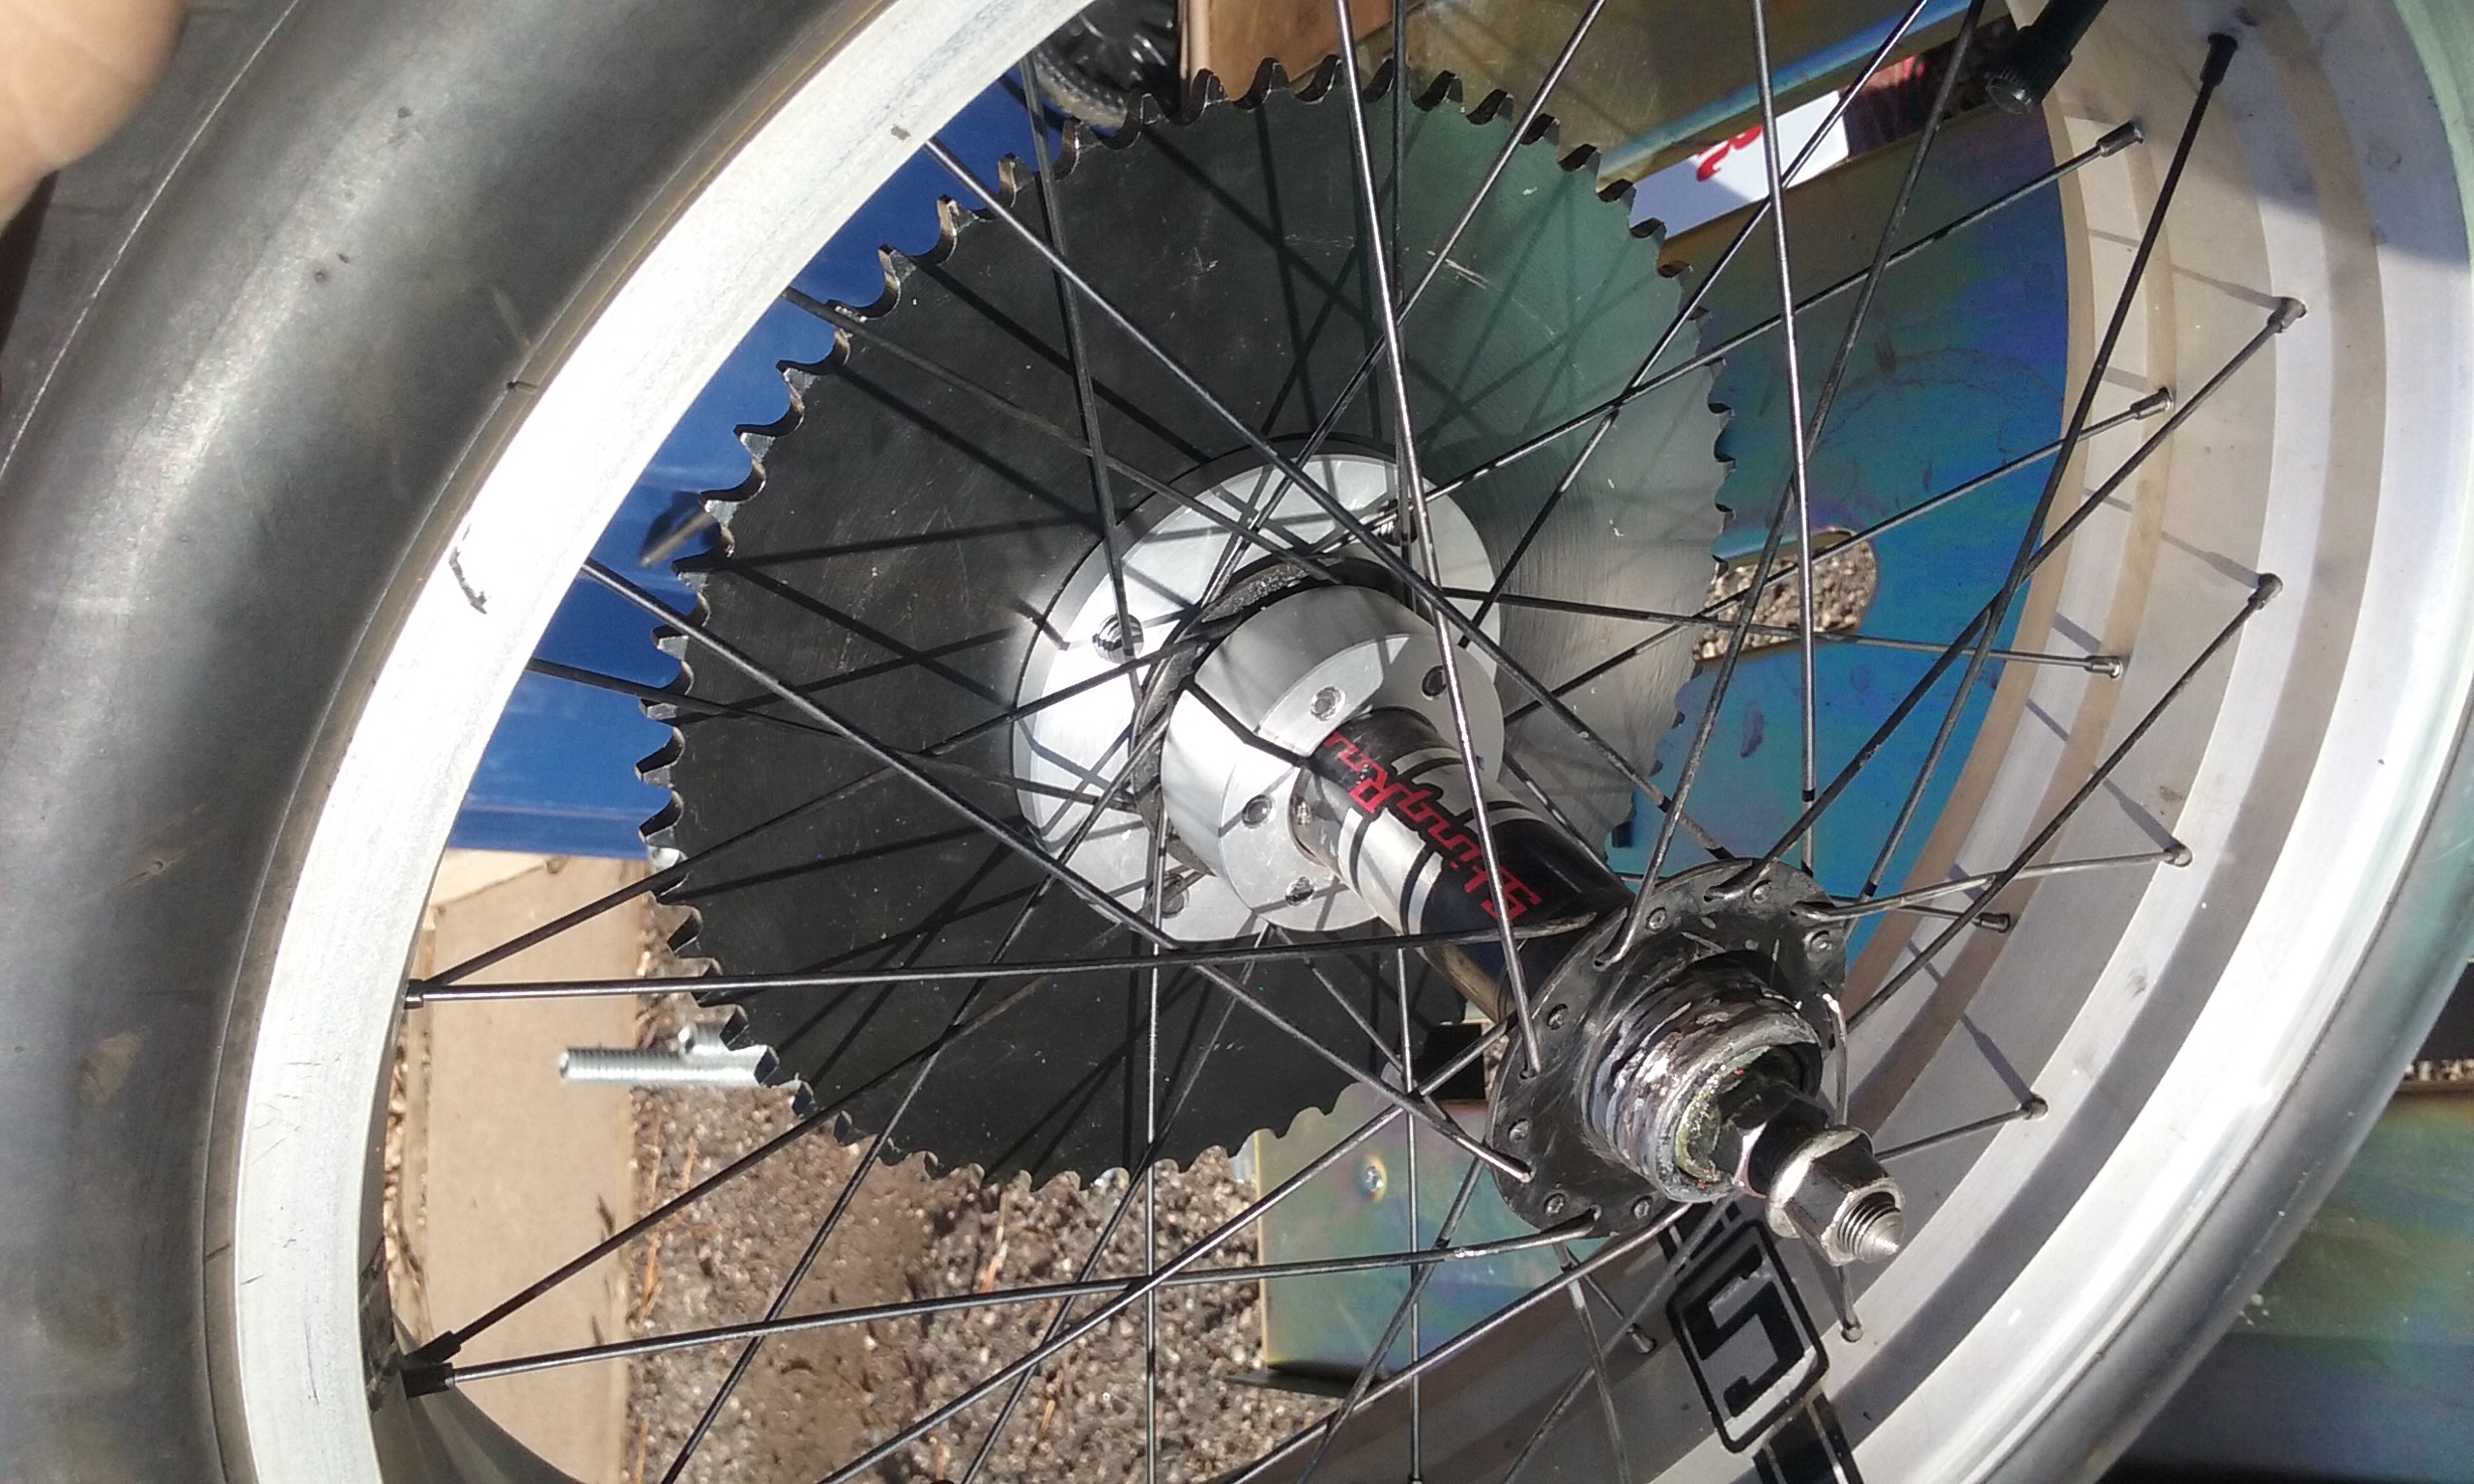
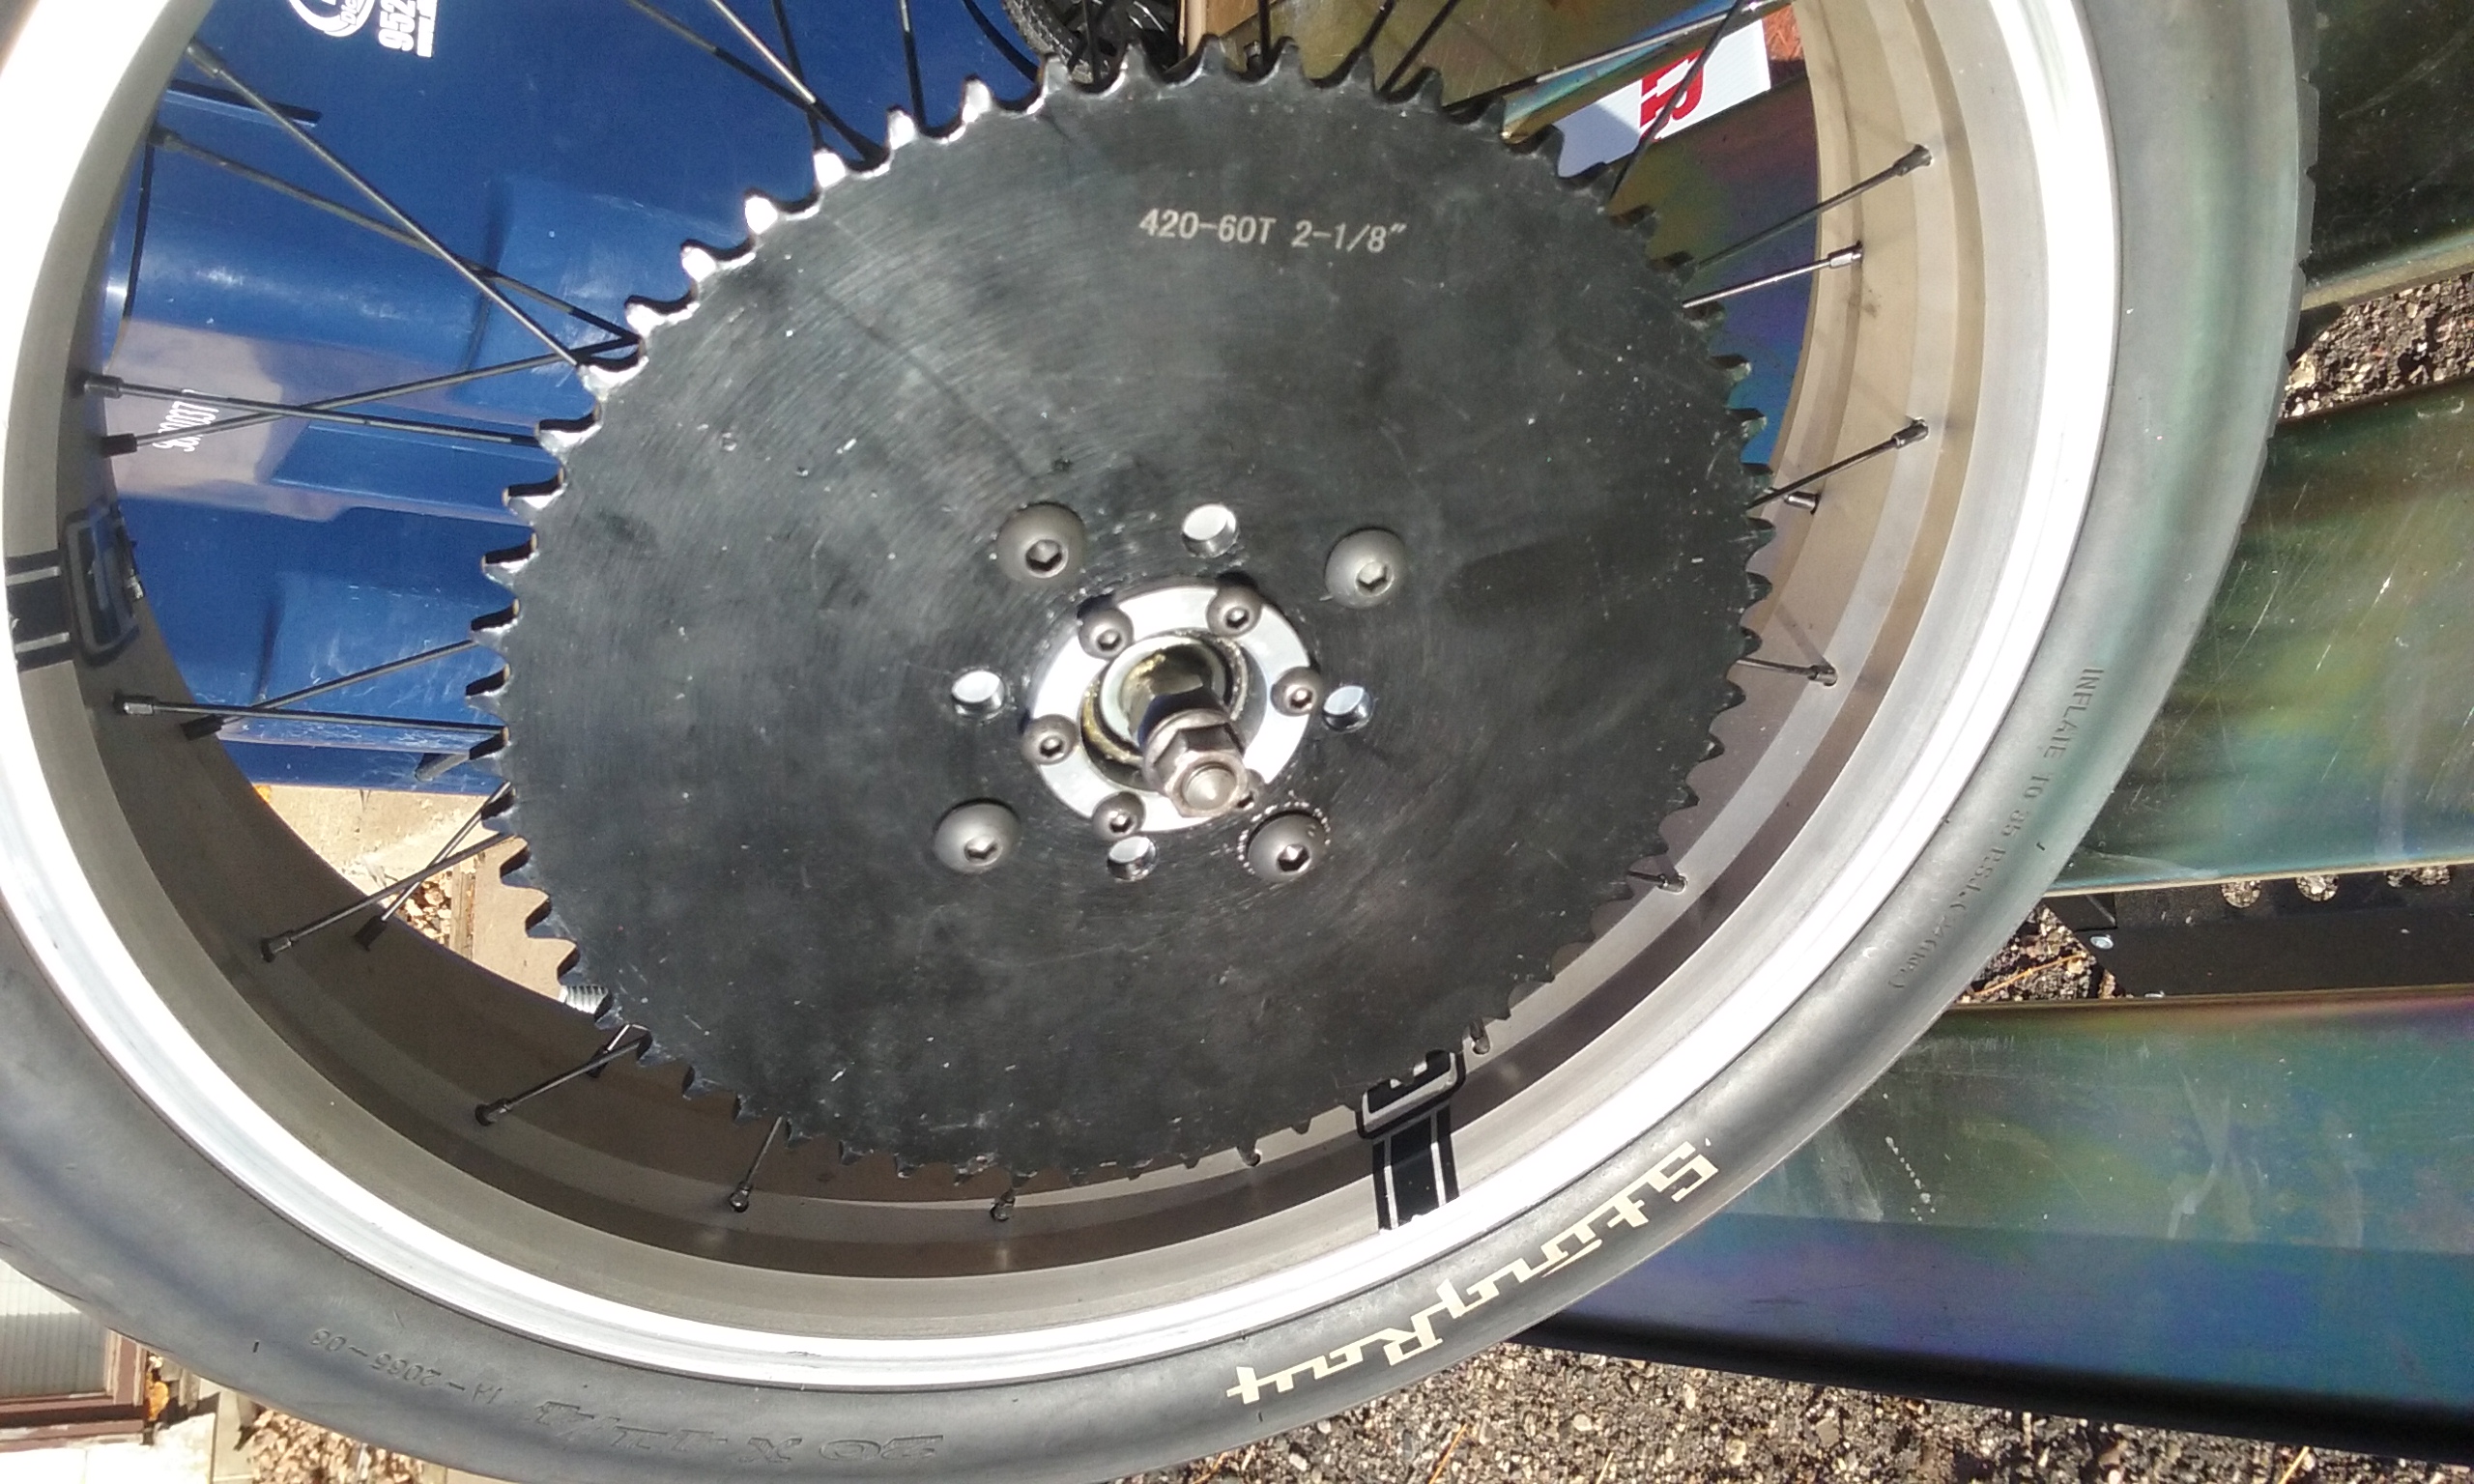
Some years back Schwinn offered a bicycle that was a "chopper" version with smaller but wider rear tire, raked front fork, etc. A friend of mine purchased one that had been modified with a Briggs and Stratton engine on it, but the final drive to the rear wheel was by v-belt. This arrangement had a tendency to slip and this was not acceptable, so he ordered a sprocket that he thought would be appropriate for the rear wheel. The previously used pulley had been WELDED to the hub of the rear wheel and had to be cut and ground off. The ham-handed way in which they ground it off left that side of the hub completely out of round and unusable for mounting a sprocket of any kind.
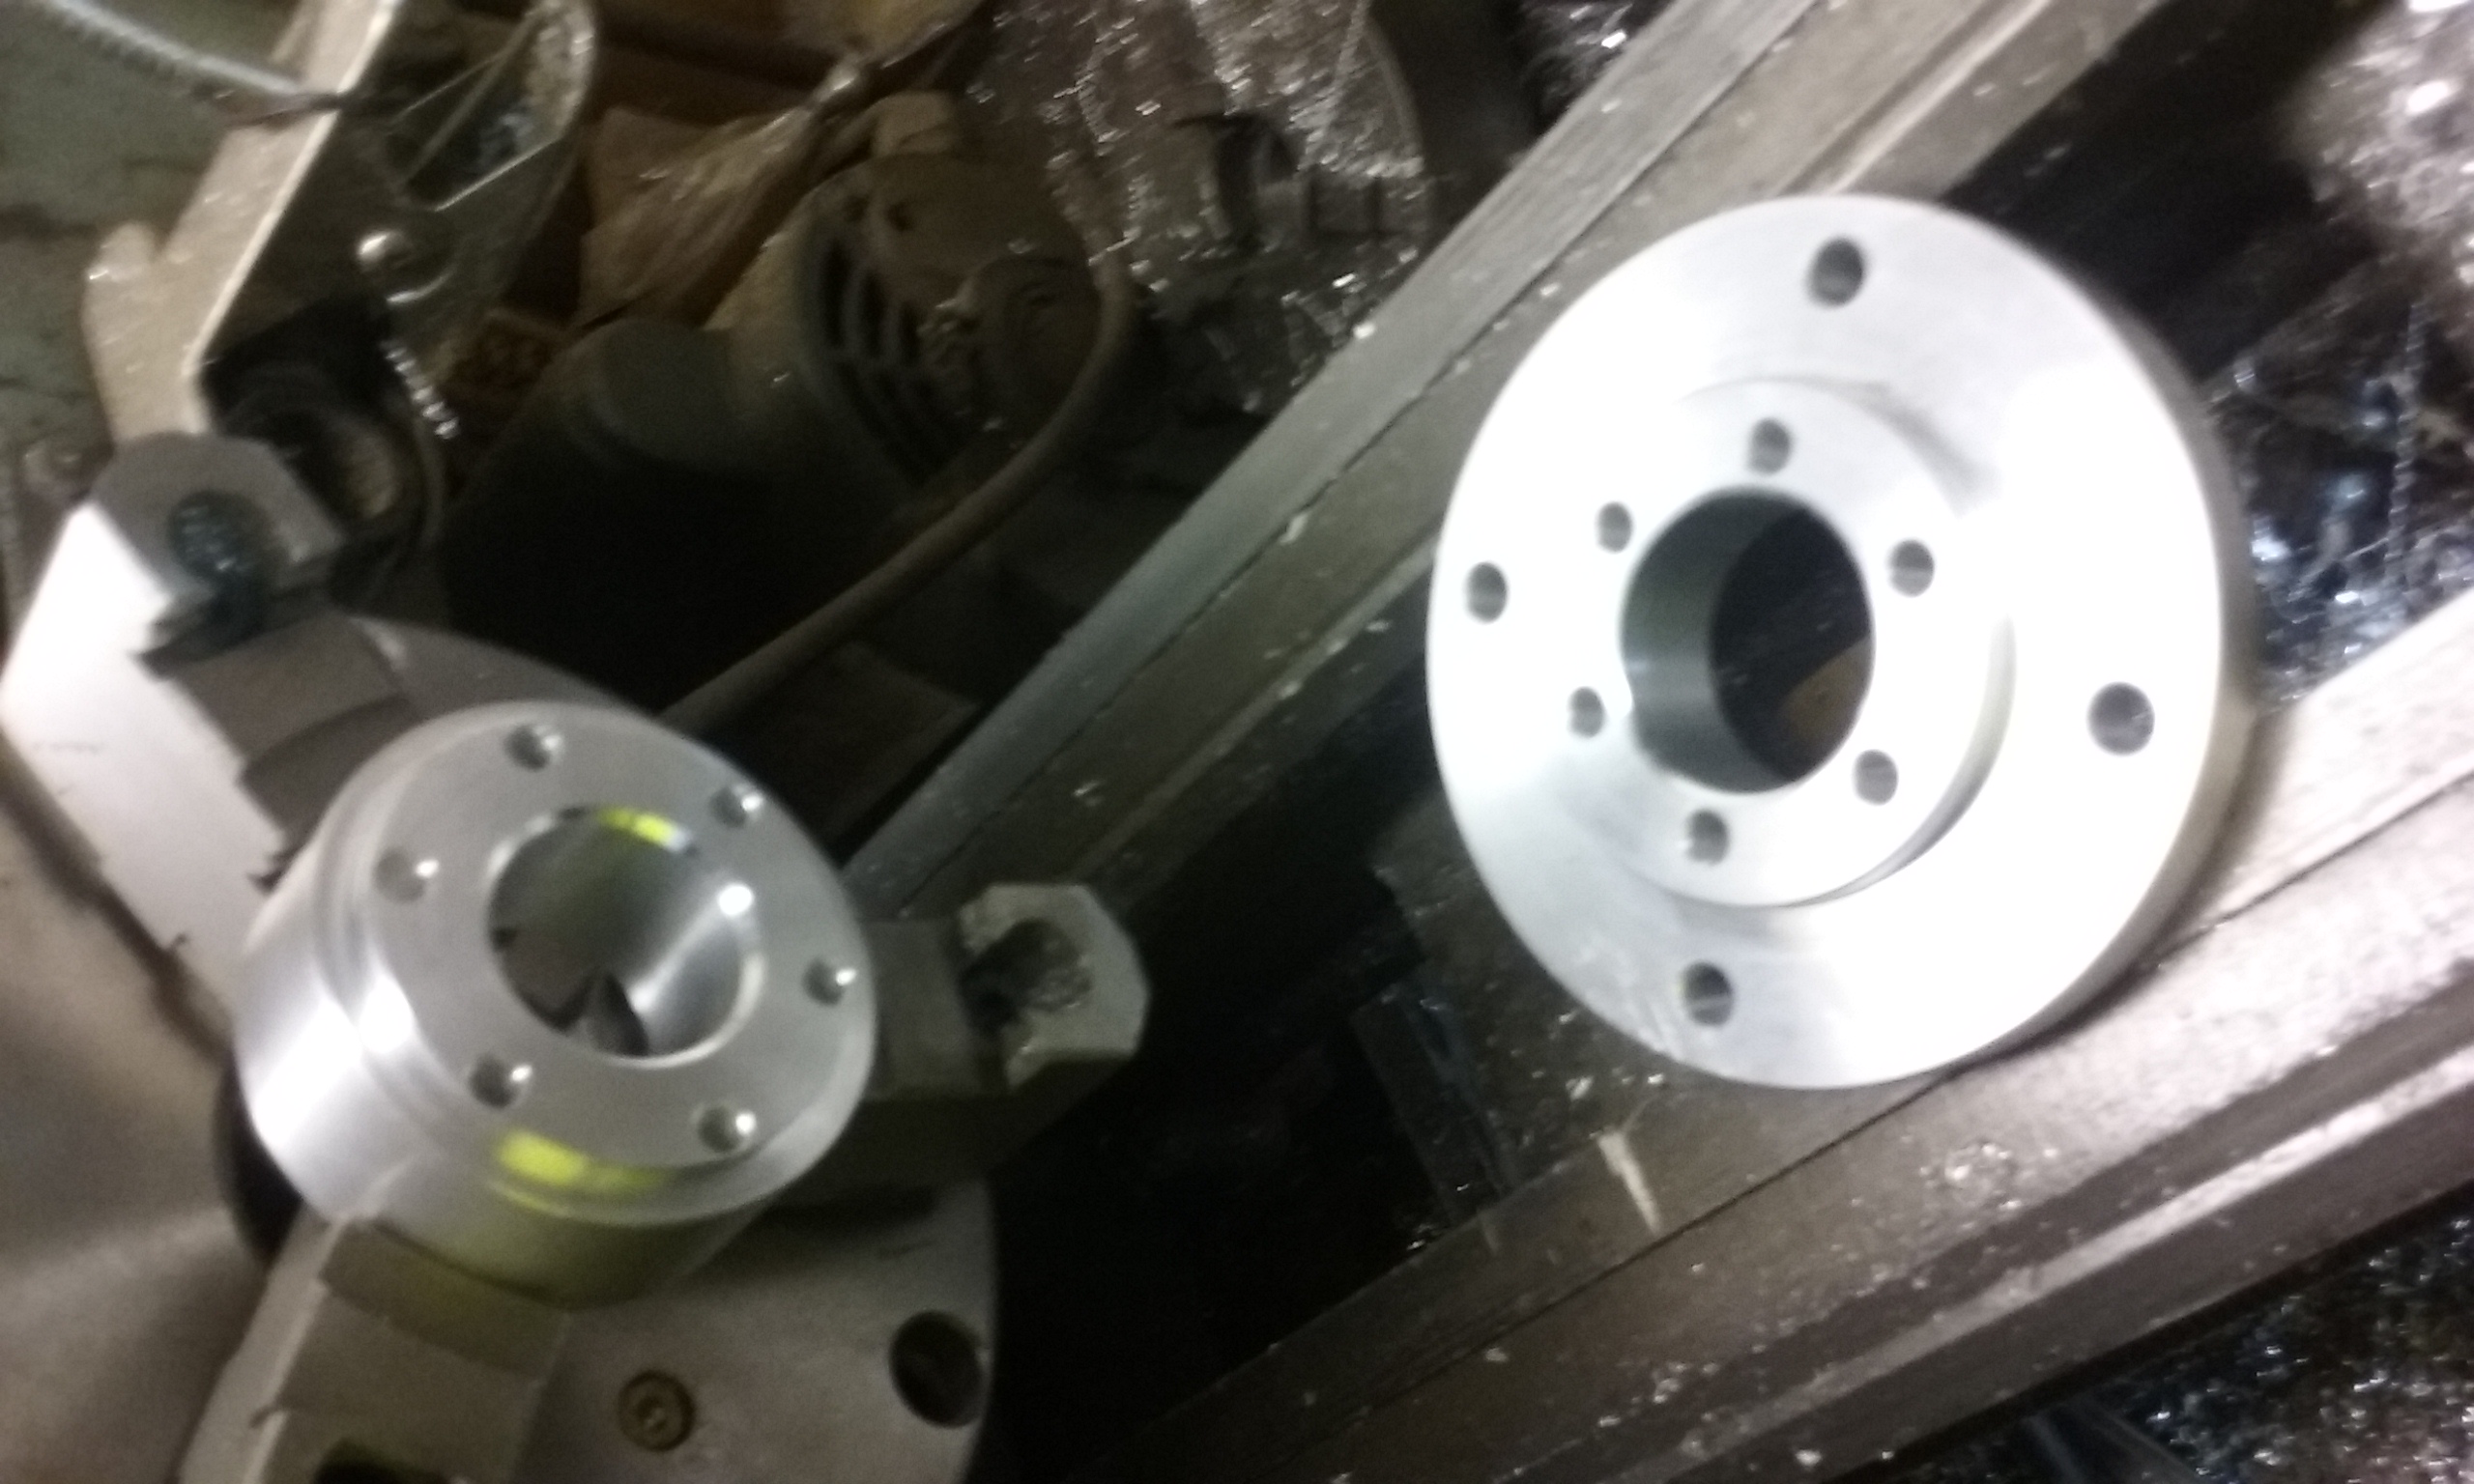
So, I had to design an adapter that would allow mounting a sprocket to the hub. Keep in mind that this hub was never designed to handle the power of a gasoline engine of any kind. Neither are the wheel bearings or axle, but despite my better judgement, I went along with it.
I came up with a design that would allow the adapter to center on the hub, but would squeeze on the flange and the hub on one side in such a way that the flange was not taking the brunt of the engine's force all by itself. I did advise the owner that there is nothing more that I can do with it short of making an entire hub that uses heavier bearings if the current parts fail. Such a custom hub would be quite expensive and would cost more than what he paid for the entire bike. The bike's owner tells me that it all works quite well so far. Time will tell, I guess. Thumbnail photos of the wheel and hub assembly are shown below. Click on them to see an enlarged version in a new window. Close that window to get back here.
This project began as a project for a local fellow who wishes to learn about machining. This project will actually be his as I mentor him in his new skills. I felt that this would be a good first project as it allows him to get experience with turning, knurling, parting off, single point threading, using steady and follow rests. It also allows him to use the mill along with a sine bar and a rotary table and to work with brass, mild steel, tool steel, and acrylic. In the end he has a light hammer that he will be able to use in his shop for many light projects, and especially in his real hobby of gunsmithing. Plans will be posted on the plans page when they are complete and photos of his progress will be posted here.